
Auth Tab provides a secure and simplified authentication flow for use in Android apps. By creating and launching an AuthTabIntent, you can invoke a specialized Custom Tab designed to manage an end-to-end authentication experience. The tab is stripped down and has limited capabilities, enabling users to focus on the task at hand. On completion the tab calls back to your application with a result using https or custom schemas.
From Chrome 137, Auth Tab can directly replace existing Custom Tabs authentication integrations. For users whose devices don't support Auth Tab, fallback to Custom Tabs is automatic. Migrating from Custom Tabs to Auth Tab can be done by modifying a few lines of code.
How it works
With Auth Tab, a client app launches a specialized Custom Tab that presents a browser window loading a URL with the expected authentication page. After completion, the Auth Tab returns the authentication result using a callback.
Following authentication, when a navigation to the previously-provided callback redirect URI occurs, the redirect is captured and returned to the client application using the callback. For redirects using the https schema, the browser verifies that the redirect domain and client app are owned by the same publisher using Digital Asset Links.
The client receives the navigated URI with the redirect scheme (or for https, redirect host and path) using the provided callback. This data includes a result code as well as any other data provided by the authentication interface. You can use this data to verify authentication or handle non-successful scenarios.
Why Auth Tab?
Before Auth Tab, you could use a standard Custom Tabs intent to power authentication flows. An Auth Tab is preferable because it provides enhanced security, a streamlined experience and also abstracts some of the internals for authentication from client code. For these reasons you'll find that Auth Tab provides a better experience.
Enhanced security
In a typical Custom Tab implementation, an intent is required to receive data from the browser window handling authentication. This requires additional code and exposes your app to potential interference into your intent. With an Auth Tab, data is received using a callback, with direct data transfer between the Android API and the client app.
A streamlined experience
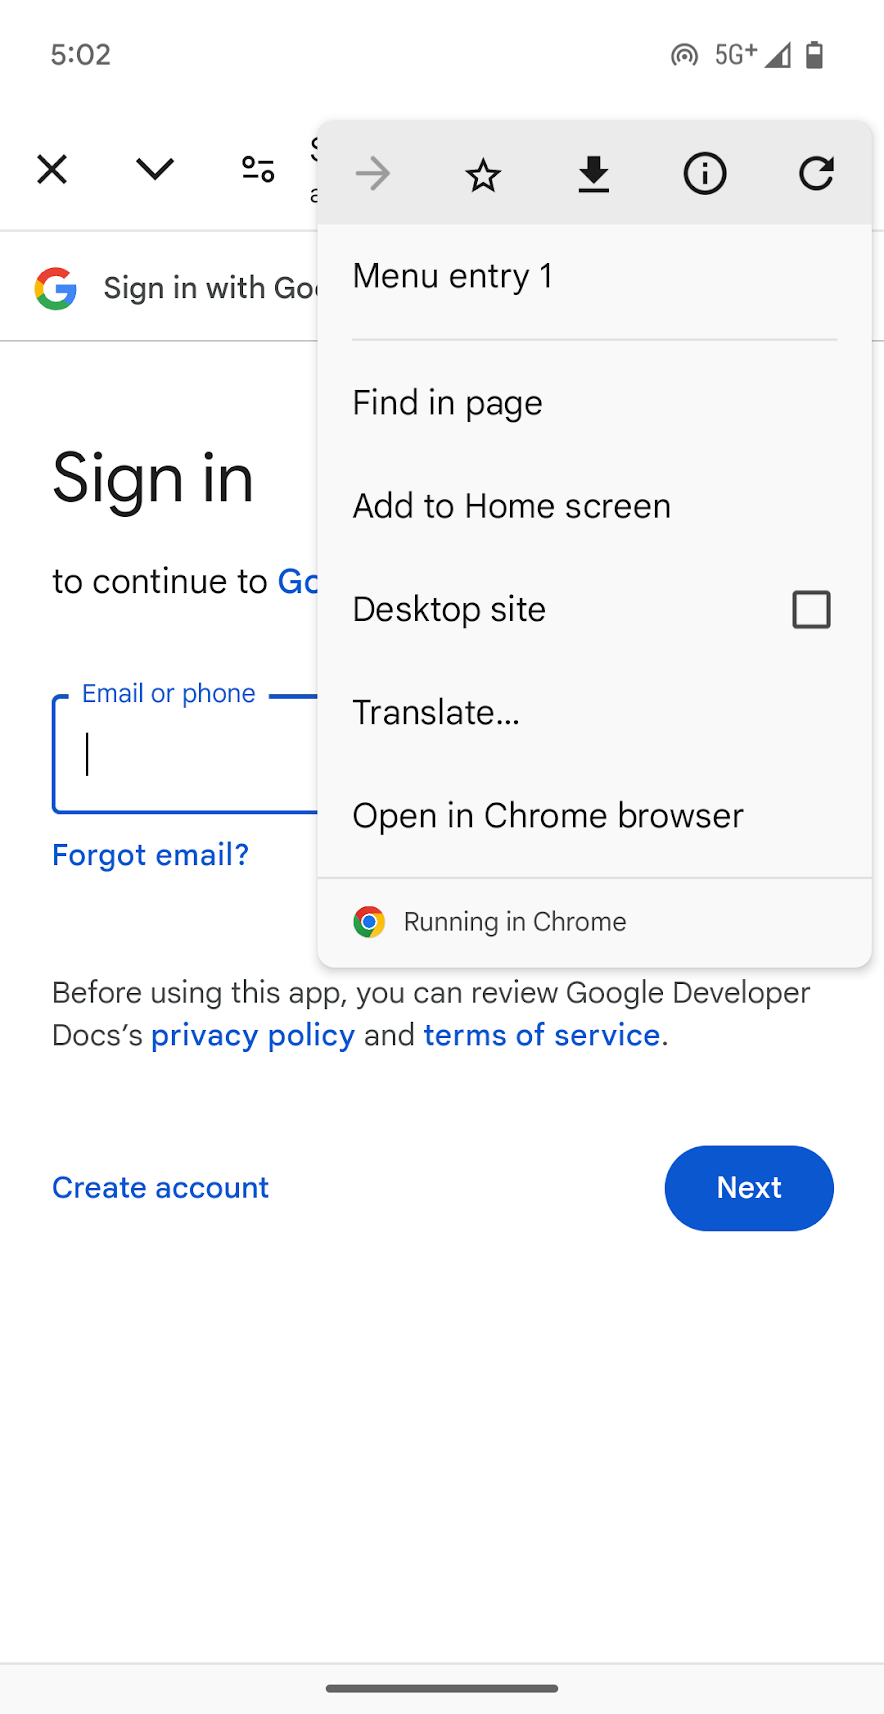
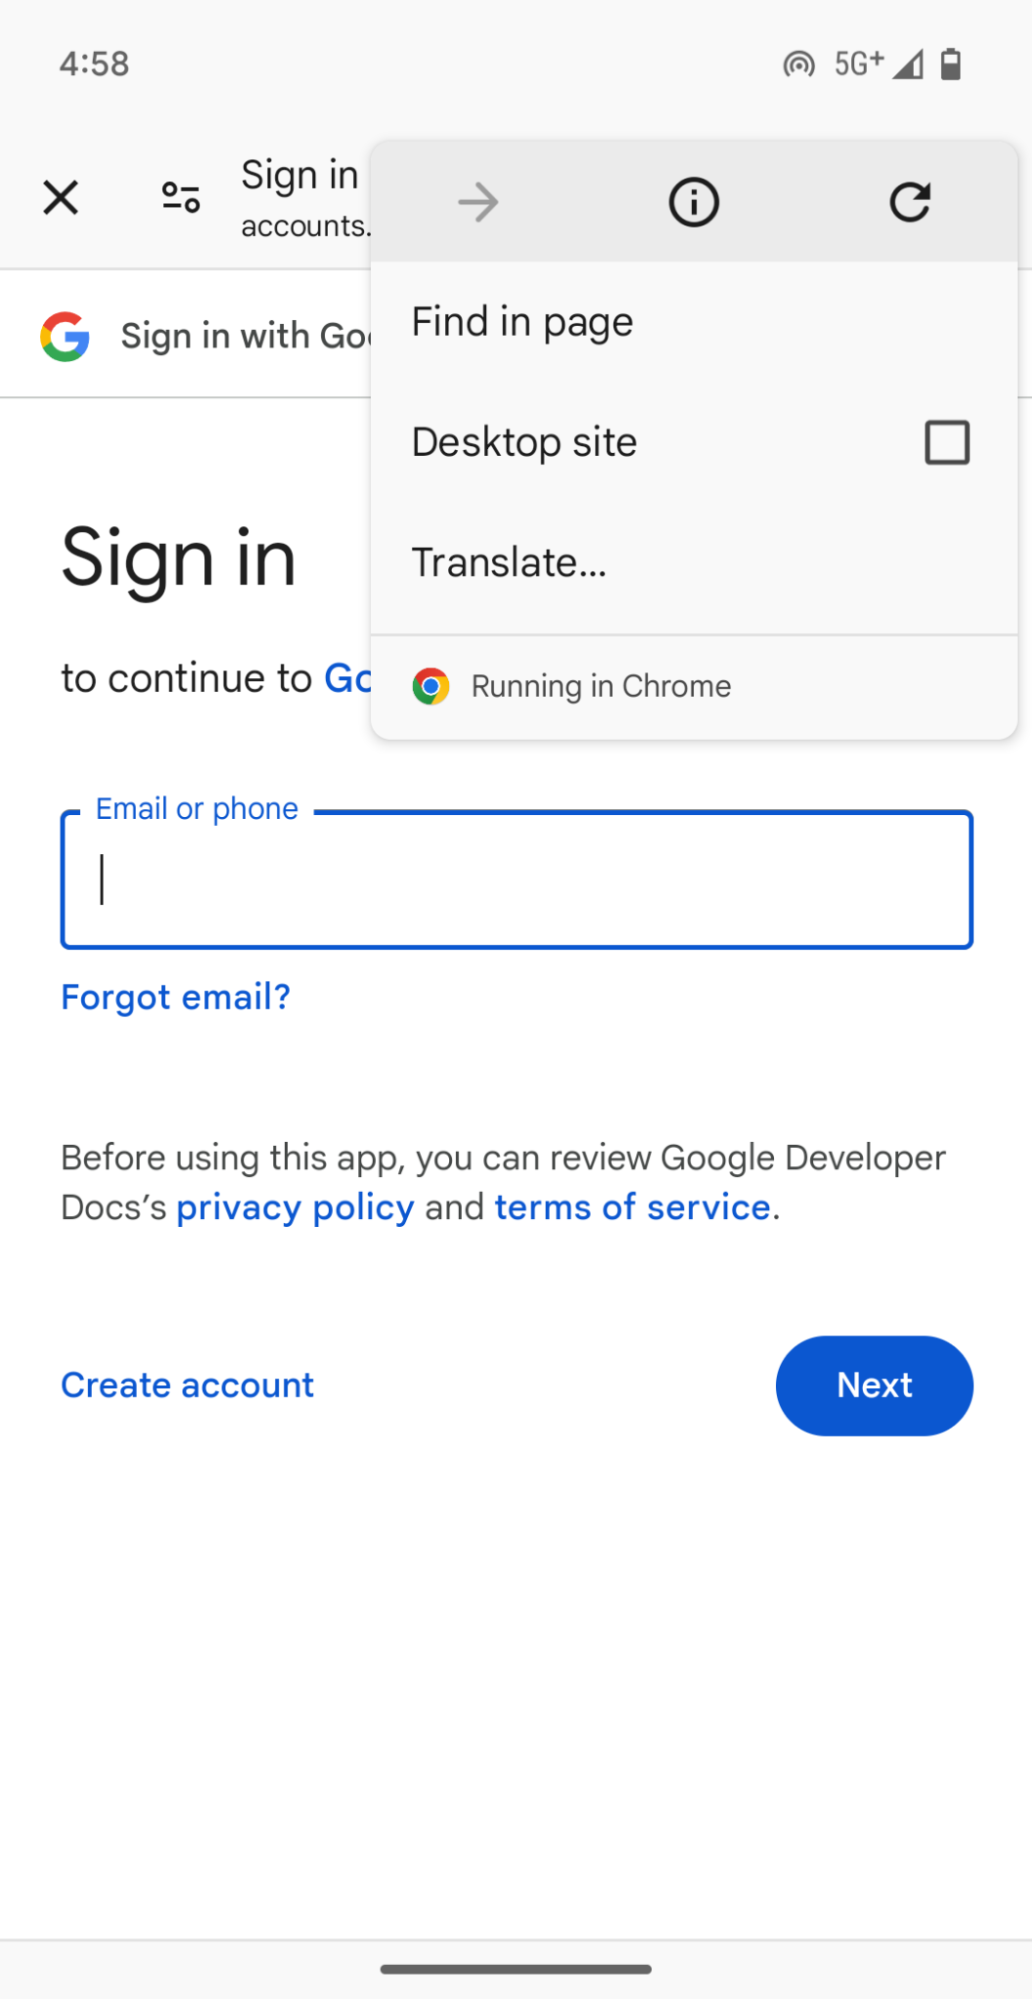
In a Custom Tab, the user has access to additional features in the browser that might be undesired for an authentication flow. An Auth Tab provides a slimmed-down experience that removes most customization options available in a standard Custom Tab. For Chrome browsers, this includes the minimize button, the long-press contextual menu, and touch to search, as well as menu items to Open in Chrome, bookmark, download and share, and Add to Homescreen.
Auth Tabs still retain features for the browser to autofill previously saved passwords and payments, navigate backward or forward, refresh, show page information, request a desktop version of the page, and provide translation.
Data abstraction
Implementing Auth Tab alone eliminates the need for an intent to receive data from the browser, as well as intent filters in AndroidManifest.xml previously required for authentication to work properly. This removes complexity on the client side. Some of these features can still be included in client code to provide backward compatibility with Custom Tabs in situations where Auth Tab is not available on user devices.
Implement Auth Tab
Auth Tab requires the AndroidX browser auth library. The AndroidX Browser Library can be added in the dependencies section of a project's build.gradle file. The APIs are available in an alpha build. Add the following to your build file:
dependencies {
    implementation 'androidx.browser:browser:1.9.0'
}
Before launching an Auth Tab, declare an ActivityResultLauncher that takes an ActivityResultCaller as well as an ActivityResultCallback. This is done before the activity or fragment is created:
// In your activity

private final ActivityResultLauncher<Intent> mLauncher =
    AuthTabIntent.registerActivityResultLauncher(this, this::handleAuthResult);

private void handleAuthResult(AuthResult result) {
    String message = switch (result.resultCode) {
        case AuthTabIntent.RESULT_OK -> "Received auth result.";
        case AuthTabIntent.RESULT_CANCELED -> "AuthTab canceled.";
        case AuthTabIntent.RESULT_VERIFICATION_FAILED -> "Verification failed.";
        case AuthTabIntent.RESULT_VERIFICATION_TIMED_OUT -> "Verification timed out.";
    }

    if (result.resultCode == AuthTabIntent.RESULT_OK) {
        message += " Uri: " + result.resultUri;
    }

    Toast.makeText(this, message, Toast.LENGTH_LONG).show();
}
Next, use AuthTabIntent.Builder to build an AuthTabIntent, then call the launch method. The launch methods accept one of two sets of parameters based on the scheme you require:
redirectScheme: For a custom redirect scheme, the browser redirects and returns the URI with scheme provided.
redirectHost, redirectPath: For https redirect schemes, the API requires a separate host and path for the browser to detect the redirect and return the URI. When using https, Digital Asset Link verification is required.
private void launchAuthTab() {
    AuthTabIntent authTabIntent = new AuthTabIntent.Builder().build();
    authTabIntent.launch(mLauncher, Uri.parse("https://www.example.com/auth"), "mycustomscheme");
}

private void launchAuthTabHttps() {
    String host = "your_host";
    String path = "your_path";
    AuthTabIntent authTabIntent = new AuthTabIntent.Builder().build();
    authTabIntent.launch(mLauncher, Uri.parse("https://www.example.com/auth"), host, path);
}
Migrate from Custom Tabs to Auth Tab
Update your existing Custom Tabs authentication implementation by modifying your Custom Tabs intent to the new Auth Tab intent. After adding the code, locate the Custom Tabs intent and modify it to the new Auth Tab intent.
CustomTabsIntent customTabsIntent = new CustomTabsIntent.Builder().build();
customTabsIntent.launchUrl(context, uri);

// change to -->

AuthTabIntent authTabIntent = new AuthTabIntent.Builder().build();

authTabIntent.launch(mLauncher, Uri.parse("https://www.example.com/auth"), "mycustomscheme");

/* - OR - */

authTabIntent.launch(mLauncher, Uri.parse("https://www.example.com/auth"), host, path);
Fallback to Custom Tabs
Some implementations can require authentication where the user's device is not equipped to handle Auth Tab. For example, this might occur if the default browser doesn't support Auth Tab or if the version of the default browser is not at the level required. In these cases an Auth Tab intent automatically launches a Custom Tab instead for browsers that support Custom Tabs.
You can check if Auth Tab is supported by the browser by using CustomTabsClient#isAuthTabSupported(). This method allows your app to dynamically choose between launching an Auth Tab or a Custom Tabs flow based on browser capabilities. To gracefully handle the situation where Auth Tab is not supported, add the Auth Tab implementation while keeping your existing Custom Tabs code handling auth flows as fallback.
Take care to handle data that can come either to your ActivityResultCallback or to your Activity intent. Note that if AuthTabIntent is used to launch the fallback experience and Auth Tab is not supported by the current browser, your app receives an Activity.RESULT_CANCELED result when the custom tab is closed.
An example of an implementation of Auth Tab with fallback to Custom Tabs can be found in the Android Browser Helper library.